

Understanding how to dip peanut butter balls in chocolate transforms homemade confections from rustic treats into professional-quality candies with smooth coatings and attractive appearance. The process requires proper chocolate preparation, correct peanut butter ball temperature, appropriate dipping tools, and specific techniques that prevent coating problems like cracking or uneven coverage. This comprehensive guide examines essential preparation steps for both peanut butter balls and chocolate, explains proper dipping technique that creates thin even coatings, provides troubleshooting solutions for common coating problems, and offers decoration ideas that elevate simple peanut butter balls into impressive gifts or party treats.
Preparing Peanut Butter Balls for Dipping
Proper peanut butter ball preparation ensures successful chocolate coating that adheres well without cracking or sliding off. Temperature and texture significantly impact dipping results.

Achieving the Right Consistency
Mix peanut butter with powdered sugar and softened butter until mixture holds shape when rolled into balls but isn't overly dry or crumbly. The ideal ratio uses one cup peanut butter to one and a half cups powdered sugar plus two tablespoons softened butter. This creates moldable texture that maintains structure through chocolate dipping without being too soft or too firm.
Natural peanut butter requires additional powdered sugar compared to conventional varieties due to higher oil content that makes mixture looser. Start with recommended ratio, adding powdered sugar tablespoon at a time until achieving proper consistency. The mixture should roll smoothly without sticking to hands excessively while holding ball shape without flattening.
Chilling for Optimal Dipping
Roll peanut butter mixture into uniform balls approximately one inch diameter, placing on parchment-lined baking sheet. Refrigerate balls at least one hour or freeze thirty minutes until very firm. Cold peanut butter balls maintain shape during chocolate dipping while warm or room temperature balls soften, losing round shape and falling apart during coating process.
Remove only small batches from refrigerator during dipping to keep remaining balls cold. Working with six to eight balls at a time prevents them from warming before coating. Return dipped balls to refrigerator while working on subsequent batches to set chocolate quickly and maintain quality.

Selecting and Preparing Chocolate
Choosing appropriate chocolate and preparing it correctly determines coating quality, with proper chocolate creating smooth thin shells that set with attractive shine.
Best Chocolate Types for Dipping
Quality chocolate with higher cocoa butter content creates superior coating that flows smoothly and sets with glossy finish. Couverture chocolate designed specifically for coating provides ideal viscosity without thinning additions. Premium dark chocolate delivers rich flavor complementing peanut butter's sweetness.
Chocolate chips or candy melts offer convenient alternatives requiring no tempering, though they produce slightly different texture than tempered couverture. Candy melts contain vegetable oils instead of cocoa butter, creating chocolate that sets quickly without tempering but with less authentic chocolate flavor. Understanding chocolate melting helps you choose appropriate variety for your skill level.
Melting Chocolate Properly
Melt chocolate using double boiler or microwave at fifty percent power in thirty-second intervals, stirring between each heating. Chocolate should reach smooth liquid consistency without overheating above ninety degrees Fahrenheit for dark chocolate or eighty-eight degrees for milk chocolate. Overheated chocolate becomes thick and grainy, creating poor coating quality.
If chocolate seems too thick for dipping, add coconut oil or vegetable shortening at ratio of one tablespoon per cup of chocolate. Stir thoroughly until incorporated, creating thinner consistency that coats peanut butter balls smoothly without excess buildup. Quality chocolate products often require minimal thinning due to optimal cocoa butter content.
Step-by-Step Dipping Technique
Proper dipping technique ensures even chocolate coverage with minimal excess coating that creates attractive appearance rather than thick clumsy shells.

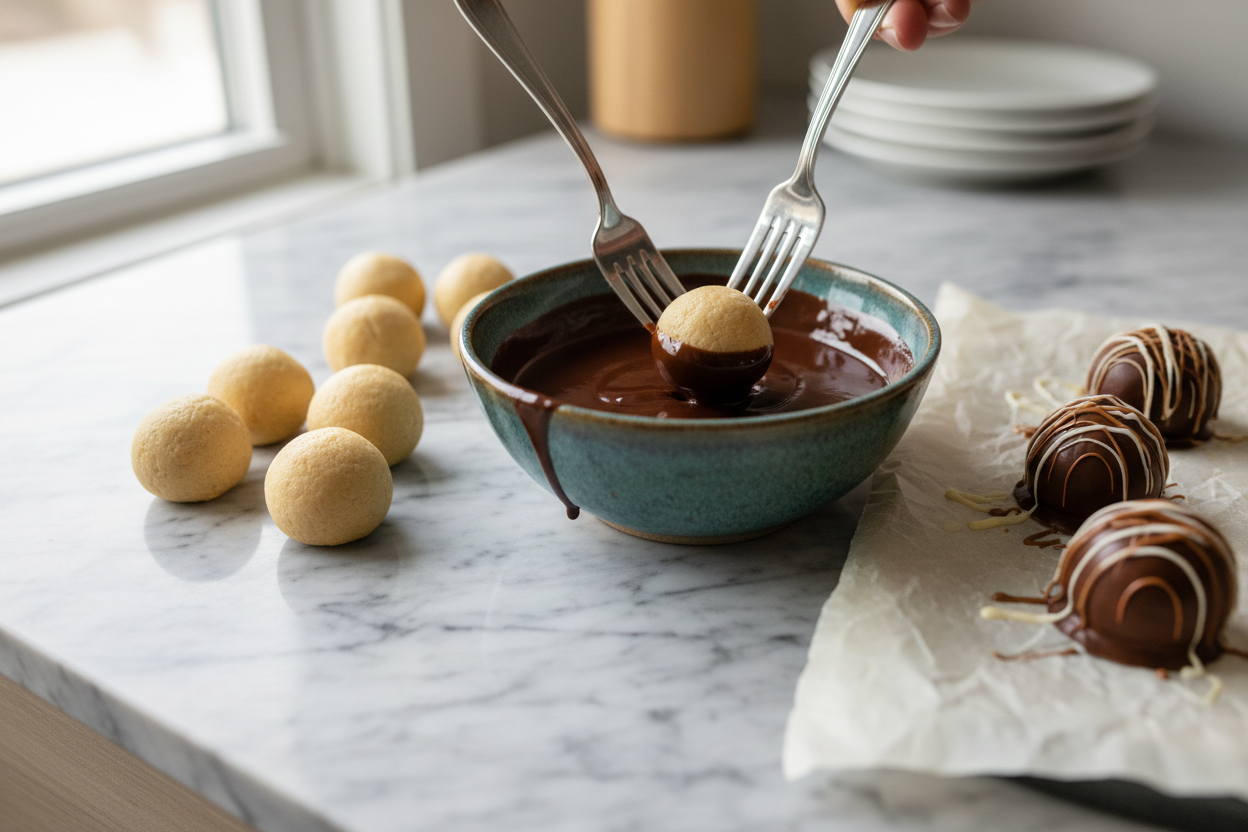
Using Dipping Tools
Insert toothpick or dipping fork into chilled peanut butter ball, submerging completely in melted chocolate. Lift ball out, allowing excess chocolate to drip back into bowl for three to five seconds. Tap fork gently on bowl edge to encourage dripping without dislodging ball from fork.
Alternatively, drop peanut butter ball into chocolate, using two forks to roll it until completely coated. Lift ball with one fork while supporting with second fork, allowing excess to drip between fork tines. This method works well for perfectly round balls without toothpick holes but requires more coordination.
Achieving Smooth Finish
Slide coated ball onto parchment-lined baking sheet using toothpick or fork, twisting slightly as you withdraw tool to minimize marking. The twisting motion prevents chocolate from creating tail or peak at separation point. Work quickly while chocolate remains fluid to achieve smoothest finish.
If toothpick hole remains visible, use clean toothpick to swirl small amount of melted chocolate over hole, smoothing it before chocolate sets. This technique hides imperfections creating professional appearance without obvious tool marks.
|
Dipping Tool |
Advantages |
Disadvantages |
Best For |
|
Toothpick |
Easy control, minimal equipment |
Leaves small hole |
Beginners, home use |
|
Dipping Fork |
Professional appearance |
Requires practice |
Large batches, gifts |
|
Two-Fork Method |
No holes, complete coverage |
Needs coordination |
Perfect appearance |
|
Spoon Method |
Good for soft balls |
Uneven coating possible |
Casual treats |
Preventing Common Coating Problems
Several issues commonly arise when dipping peanut butter balls, each with specific causes and solutions that restore coating quality.
Chocolate Cracking After Setting
Chocolate cracks form when temperature differential between cold peanut butter ball and room temperature chocolate creates stress during setting. Allow peanut butter balls to sit at room temperature five minutes before dipping to reduce temperature shock. This brief warming doesn't soften balls significantly but prevents dramatic temperature contrast causing cracks.
Alternatively, use tempered chocolate rather than simply melted chocolate. Properly tempered chocolate contracts evenly during cooling, reducing crack formation on dipped confections. While tempering requires additional skill, it produces superior results worth learning for regular candy making.
Chocolate Sliding Off Balls
Chocolate slides off peanut butter balls when they're too warm or when chocolate is too thin. Ensure balls are thoroughly chilled before dipping and work quickly to minimize warming from handling. If chocolate seems too thin and won't adhere properly, allow it to cool slightly before continuing dipping.
Condensation on refrigerated balls can prevent chocolate adhesion. Let balls sit at room temperature two to three minutes after removing from refrigerator to evaporate surface moisture before dipping. This brief period prevents condensation without significantly softening peanut butter mixture.

Thick Coating Build-Up
Excessively thick chocolate coating results from insufficient dripping time or chocolate that's too cool and viscous. Hold coated ball over chocolate bowl longer, allowing more excess to drip away before transferring to parchment. Gently tap fork or toothpick on bowl edge to encourage dripping.
If chocolate has thickened during dipping session, rewarm gently to restore fluid consistency. Use chocolate melter that maintains consistent temperature throughout extended dipping sessions, eliminating need for repeated reheating.
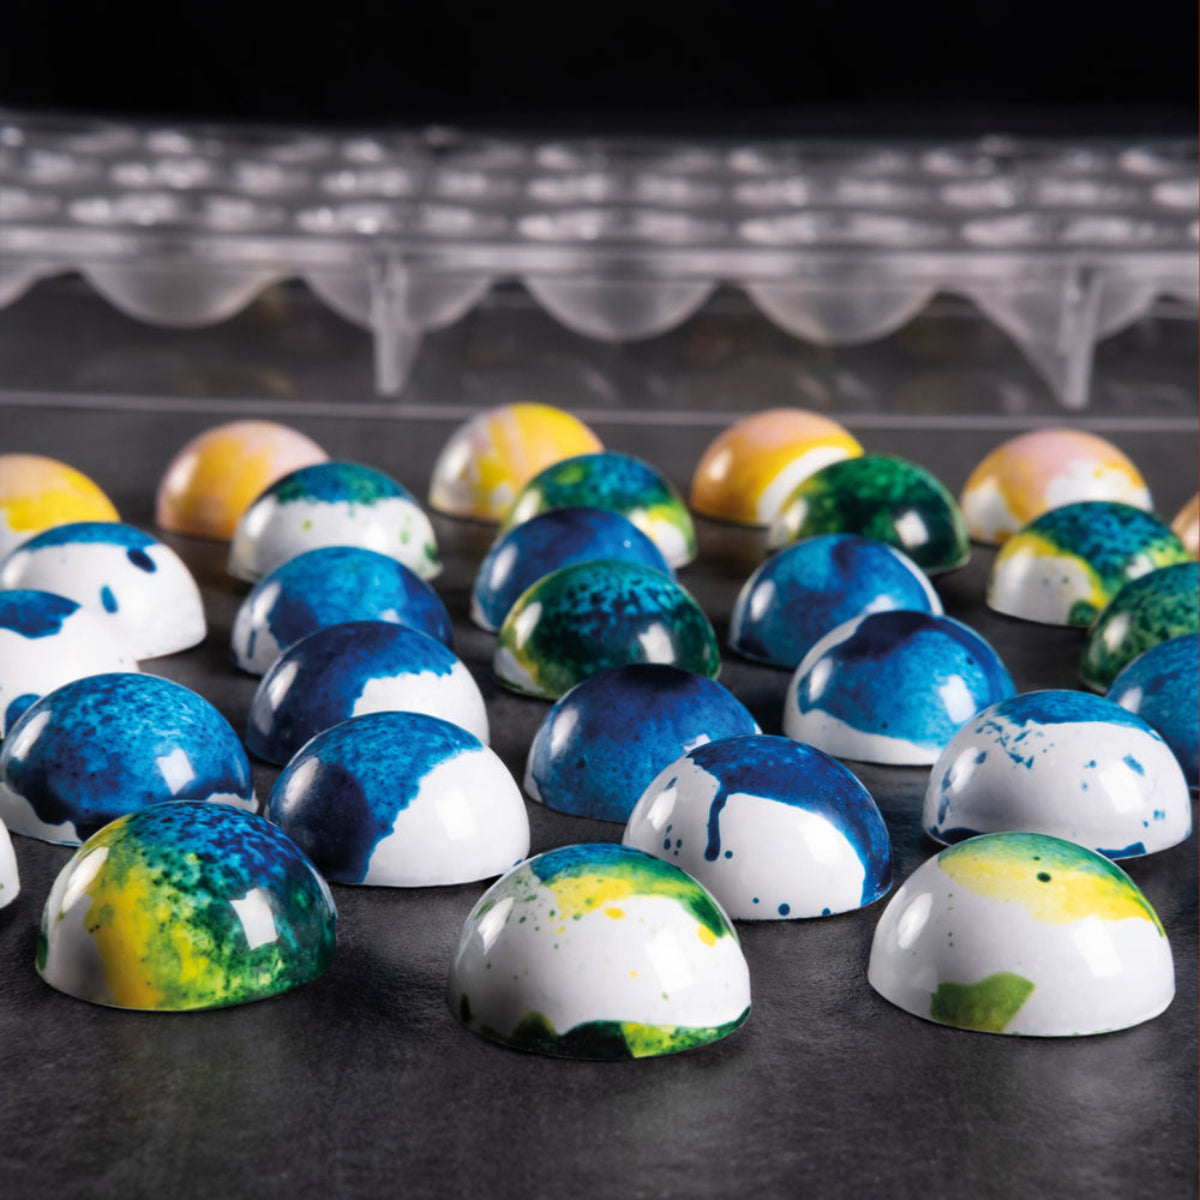
Decoration and Finishing Touches
Simple decorations transform plain chocolate-covered peanut butter balls into elegant confections suitable for gifts or special occasions.
Drizzle Patterns
After chocolate coating sets but before completely hardening, drizzle contrasting chocolate in zigzag pattern using piping bag or fork. White chocolate drizzled over dark chocolate coating creates striking visual contrast while milk chocolate drizzle over white coating offers subtle variation. Use disposable piping bags for precise drizzle control.
For drizzle success, ensure base coating is set enough that drizzle doesn't blend into it but not so hard that drizzle doesn't adhere. The ideal window occurs ten to fifteen minutes after dipping when base coating appears matte rather than wet and glossy.
Topping Applications
Sprinkle chopped nuts, sea salt flakes, or colored sprinkles onto wet chocolate immediately after dipping for decorations that adhere firmly. These toppings must be applied within thirty seconds of coating while chocolate remains sticky enough to hold them. Press toppings gently to encourage adhesion without disturbing smooth chocolate surface.
Create sophisticated appearance using chocolate decoration tools to make chocolate curls, shavings, or other garnishes placed strategically on set peanut butter balls. These professional touches elevate simple candies into impressive confections worthy of gift boxes or dessert platters.
Storage and Shelf Life
Proper storage maintains peanut butter ball quality while preventing chocolate bloom or texture degradation that reduces appeal.
Short-Term Storage
Store chocolate-covered peanut butter balls in single layer in airtight container at cool room temperature between sixty and sixty-eight degrees Fahrenheit. Layered storage requires parchment paper between levels to prevent sticking or chocolate damage. Properly stored balls maintain quality one to two weeks at room temperature.
Avoid refrigerating chocolate-covered peanut butter balls unless room temperature exceeds seventy-five degrees, as refrigeration causes chocolate bloom—white streaks or spots that appear when chocolate experiences temperature fluctuations. If refrigeration is necessary, wrap container tightly and allow balls to return to room temperature before serving to prevent condensation.
Freezing for Long-Term Storage
Freeze peanut butter balls up to three months in freezer-safe container or zip-top bags with air removed. Place parchment between layers to prevent sticking. Thaw frozen balls in refrigerator overnight, then bring to room temperature before serving for best texture and flavor.
Chocolate coating may develop slight bloom after freezing but this cosmetic issue doesn't affect safety or taste. For gift-giving or special occasions, prepare fresh batches rather than using frozen inventory to ensure optimal appearance.
Scaling Up for Large Batches
Efficient techniques for large-scale production streamline the dipping process when making dozens or hundreds of peanut butter balls for parties or gifts.
Use assembly-line approach with one person rolling balls, another dipping, and a third decorating if working with helpers. This division of labor maintains steady workflow while keeping peanut butter balls properly chilled throughout process. Rotate tasks to prevent fatigue from repetitive motions.
Maintain multiple batches of melted chocolate in professional melting equipment that holds consistent temperature eliminating constant reheating. Having backup chocolate ready prevents production delays when first batch runs low.
Create uniform peanut butter balls using small cookie scoop that portions consistent amounts ensuring even sizing across entire batch. Uniform balls dip more easily and create professional appearance compared to hand-rolled balls with size variations.
Creative Flavor Variations
Beyond classic peanut butter and chocolate combination, several variations create unique flavors that showcase versatility while using same dipping technique.
Mix crushed graham crackers, coconut flakes, or chopped pretzels into peanut butter mixture for textured centers that add crunch and flavor complexity. These additions don't affect dipping process but create more interesting eating experience than smooth peanut butter alone.
Use alternative nut butters including almond, cashew, or sunflower seed butter for people with peanut allergies or those seeking flavor variation. These butters follow identical preparation and dipping procedures as peanut butter while offering distinct flavors that pair beautifully with chocolate coating.
Add flavoring extracts like vanilla, almond, or peppermint to peanut butter mixture before rolling for subtle flavor enhancement. Use extracts sparingly—quarter to half teaspoon per batch—as excessive amounts create overpowering taste that overwhelms chocolate and peanut butter flavors.
Understanding how to dip peanut butter balls in chocolate transforms simple ingredients into professional-quality confections through proper preparation and technique. Success requires thoroughly chilled peanut butter balls with firm texture that maintains shape during dipping, properly melted chocolate at optimal temperature and viscosity, and controlled dipping technique using toothpicks or forks that creates even coating without excess buildup. Common problems including chocolate cracking, sliding, or thick coating respond to specific solutions addressing temperature management, timing, and chocolate consistency. Simple decorations including drizzle patterns and sprinkled toppings elevate appearance while proper storage maintains quality for one to two weeks at room temperature or three months frozen. For premium chocolate products, professional melting equipment, and elegant presentation tools that showcase your chocolate-covered creations, explore quality selections at Zucchero Canada where confectionery excellence meets accessible techniques for home chocolatiers.
References:
Greweling, P. (2024). Chocolates and confections: Formula, theory, and technique (3rd ed.). John Wiley & Sons.
McGee, H. (2024). On food and cooking: The science and lore of the kitchen (3rd ed.). Scribner.
Morato, R. (2023). Advanced chocolate work: Contemporary approaches. Chocolate Academy Center.
Ziegler, G. R. (2024). Industrial chocolate manufacture and use (5th ed.). Wiley-Blackwell.


Leave a comment
All comments are moderated before being published.
This site is protected by hCaptcha and the hCaptcha Privacy Policy and Terms of Service apply.