

Key Takeaways
- Temperature control is the most critical factor in successful chocolate tempering
- Different chocolate types (dark, milk, white) require different tempering temperatures
- Common problems like bloom, streaking, and thickness issues can be fixed with proper techniques
- A clean, dry workspace with controlled humidity is essential for perfect results
- Professional-quality chocolate with higher cocoa butter content tempers more consistently
- Shop Zucchero Canada's chocolate selection for high-quality tempering ingredients
Mastering chocolate tempering transforms your confections from amateur to professional quality. Whether you're encountering dull finishes, improper setting, or frustrating streaks, this comprehensive guide will help you identify and solve common tempering problems for flawless results every time.
Understanding Chocolate Tempering
What is Chocolate Tempering?
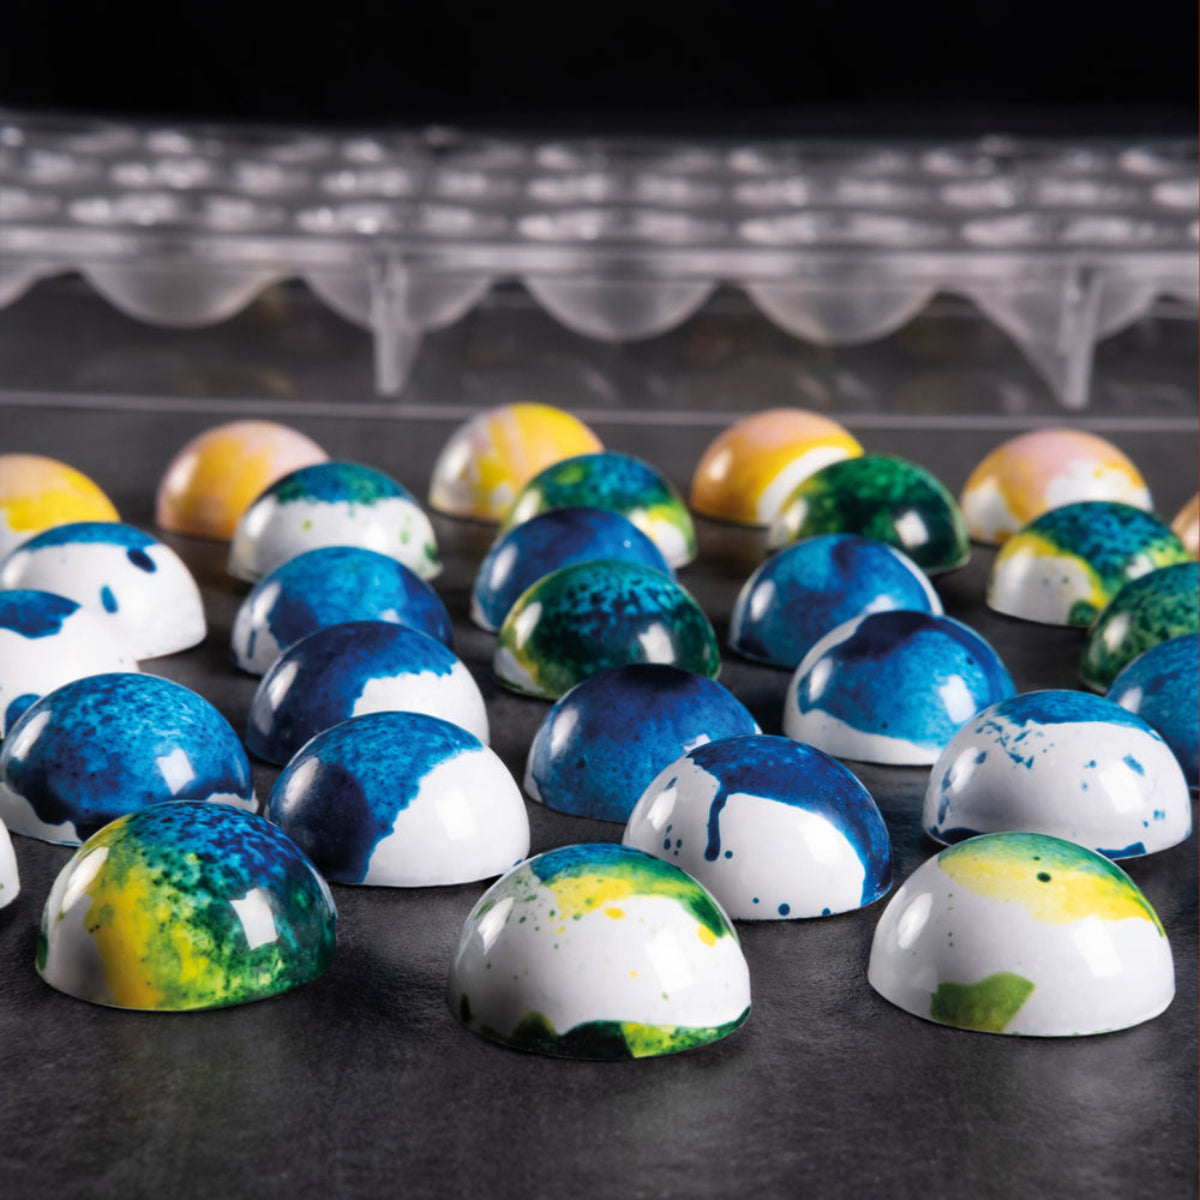
Chocolate tempering is a precise heating and cooling process that properly crystallizes the cocoa butter in chocolate. When done correctly, tempering gives chocolate its characteristic glossy appearance, satisfying snap, smooth mouthfeel, and resistance to melting at room temperature.
The science behind tempering involves manipulating the cocoa butter crystals within the chocolate. Cocoa butter can crystallize in six different forms, but only one form (Form V or beta crystals) creates the desirable qualities we associate with premium chocolate. Tempering ensures that these beta crystals predominate in the final product.
Why Tempering Chocolate Matters
Tempering chocolate isn't just about aesthetics—it fundamentally changes the quality and stability of your finished product. Properly tempered chocolate:
- Sets quickly with a glossy surface
- Releases easily from molds
- Contracts slightly during cooling
- Has a satisfying snap when broken
- Resists melting at room temperature
- Has a longer shelf life without bloom
Untempered chocolate, by contrast, sets slowly, appears dull, melts easily when handled, and quickly develops unattractive white or gray streaks (bloom).
Different Types of Chocolate and Their Tempering Requirements
Each type of chocolate has unique tempering requirements due to differences in composition, particularly in cocoa butter and milk fat content:
Dark Chocolate:
- Melting temperature: 120-122°F (49-50°C)
- Cooling temperature: 80-82°F (27-28°C)
- Working temperature: 88-91°F (31-33°C)
Milk Chocolate:
- Melting temperature: 115-118°F (46-48°C)
- Cooling temperature: 80-82°F (27-28°C)
- Working temperature: 84-86°F (29-30°C)
White Chocolate:
- Melting temperature: 105-113°F (40-45°C)
- Cooling temperature: 78-80°F (26-27°C)
- Working temperature: 82-84°F (28-29°C)
The higher milk fat content in milk and white chocolate makes them more sensitive to heat and more challenging to temper than dark chocolate. Always consult the specific manufacturer's guidelines for the chocolate you're using, as formulations can vary.
Common Chocolate Tempering Problems
Chocolate Bloom: Causes and Solutions
Bloom is one of the most common chocolate tempering issues, appearing as white or grayish streaks or spots on the chocolate's surface. There are two types of bloom:
Fat Bloom:
- Appearance: Grayish-white streaks with a slick, sometimes greasy feel
-
Causes:
- Improper tempering
- Temperature fluctuations during storage
- Overheating during tempering
- Inadequate cooling
-
Solutions:
- Store chocolate at a constant temperature between 60-70°F (15-21°C)
- Ensure proper tempering with precise temperature control
- Avoid temperature shocks during cooling
- Use a fan for even cooling (not refrigeration)
Sugar Bloom:
- Appearance: Rough, powdery white film with a grainy texture
-
Causes:
- Moisture exposure (condensation, humid environment)
- Moving chocolate from cold to warm environments
- Refrigeration without proper sealing
-
Solutions:
- Maintain a dry environment (humidity below 50%)
- Avoid refrigeration when possible
- If refrigeration is necessary, seal chocolate completely and allow it to reach room temperature before unwrapping
- Use air conditioning to control humidity in warm environments
While bloomed chocolate is safe to eat, the texture and appearance are compromised. Fortunately, it can be remelted and properly tempered to restore its quality.
Chocolate Not Setting Properly
When chocolate doesn't set or hardens too slowly, it indicates tempering issues:
Causes:
- Incorrect working temperature (too warm)
- Insufficient cooling time
- Lack of proper beta crystal formation
- Working in a warm environment
Solutions:
- Verify temperatures with an accurate thermometer
- Allow sufficient cooling time in a temperature-controlled environment
- Add properly tempered chocolate ("seed") to introduce correct crystals
- Ensure the ambient temperature is between 65-70°F (18-21°C)
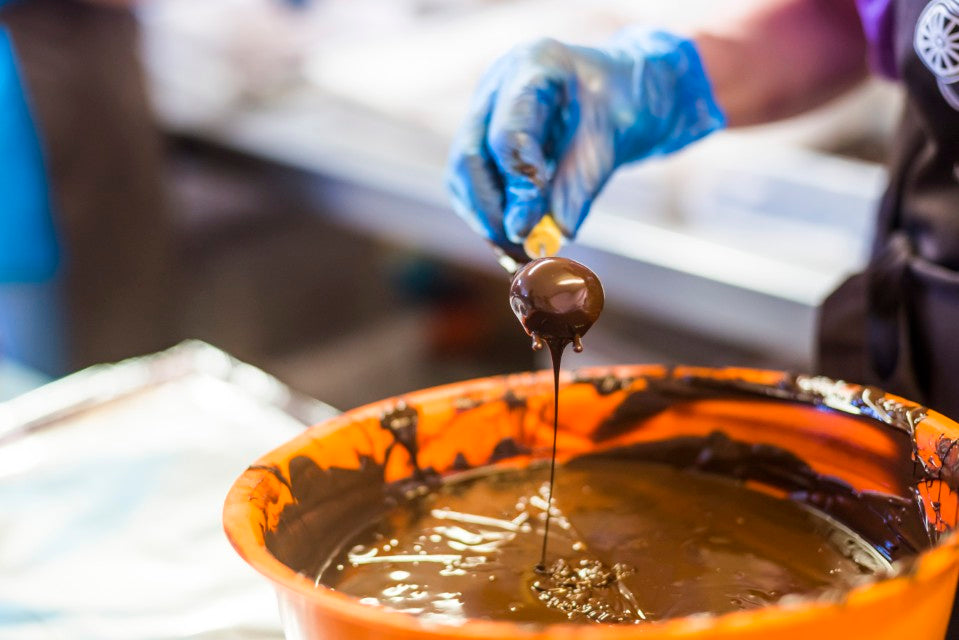
- Test your temper before proceeding (spread a thin layer of chocolate on parchment; it should begin setting within 2-3 minutes)
Chocolate Too Thick or Too Thin
The consistency of your tempered chocolate affects its usability for dipping, molding, or enrobing:
Too Thick Chocolate:
-
Causes:
- Temperature too low
- Over-crystallization
- Too much seed chocolate added
- Low-quality chocolate with insufficient cocoa butter
-
Solutions:
- Carefully raise the temperature (but stay within working range)
- Add a small amount of melted, untempered chocolate
- Choose couverture chocolate with higher cocoa butter content (min 31%)
- Follow manufacturer's recommendations for your specific chocolate
Too Thin Chocolate:
-
Causes:
- Temperature too high
- Insufficient crystallization
- Not enough seed chocolate added
-
Solutions:
- Lower the temperature within the working range
- Add more tempered seed chocolate
- Continue agitating to encourage crystal formation
Streaky or Dull Chocolate Finish
A streaky or dull finish often indicates incomplete or uneven crystallization:
Causes:
- Uneven temperatures in the chocolate mixture
- Insufficient stirring during cooling
- Improper cooling environment
- Contaminated molds or work surfaces
Solutions:
- Ensure thorough mixing during tempering to distribute crystals evenly
- Use a thermometer to check for hot or cold spots
- Ensure molds are clean, dry, and at the same temperature as the chocolate
- Polish molds with cotton balls if necessary
- Use a fan for even cooling
Chocolate Setting Too Quickly
While fast setting can sometimes be desirable, it can make working with chocolate difficult:
Causes:
- Working temperature too low
- Too many seed crystals
- Excessive agitation
- Cold molds or work surfaces
Solutions:
- Raise the temperature slightly (while staying in the working range)
- Warm tools and molds to match chocolate temperature
- Work quickly and efficiently
- Have everything prepared before tempering
Essential Equipment for Successful Chocolate Tempering
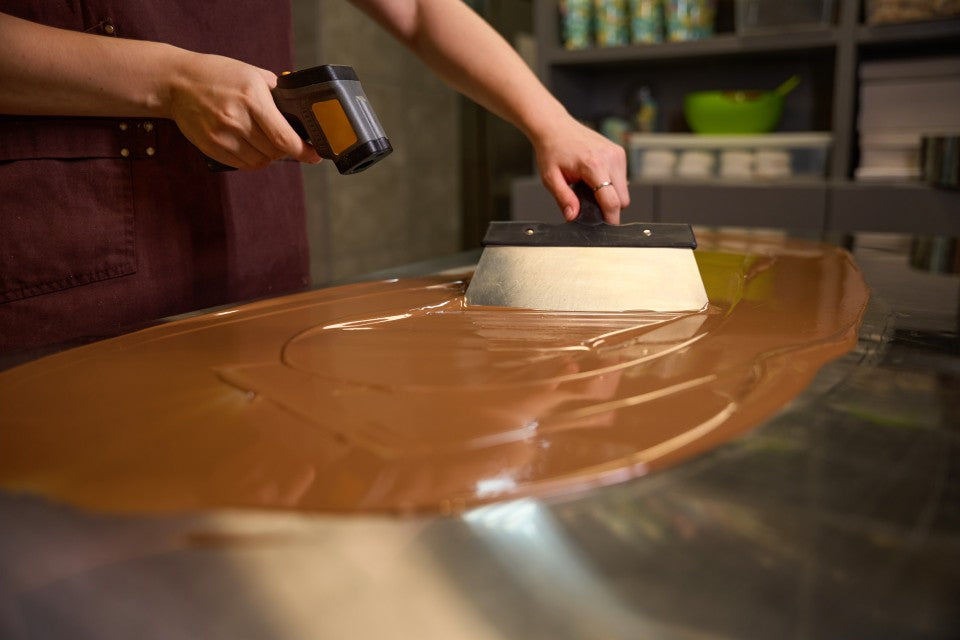
Temperature Control Tools
Precise temperature control is the foundation of successful tempering:
Digital Thermometer:
- Essential for monitoring chocolate temperatures
- Choose one with 0.1-degree precision
- Infrared thermometers are convenient for surface temperature checks
Heat Sources:
- Double boiler for gentle heating
- Microwave (at 50% power) for quick melting
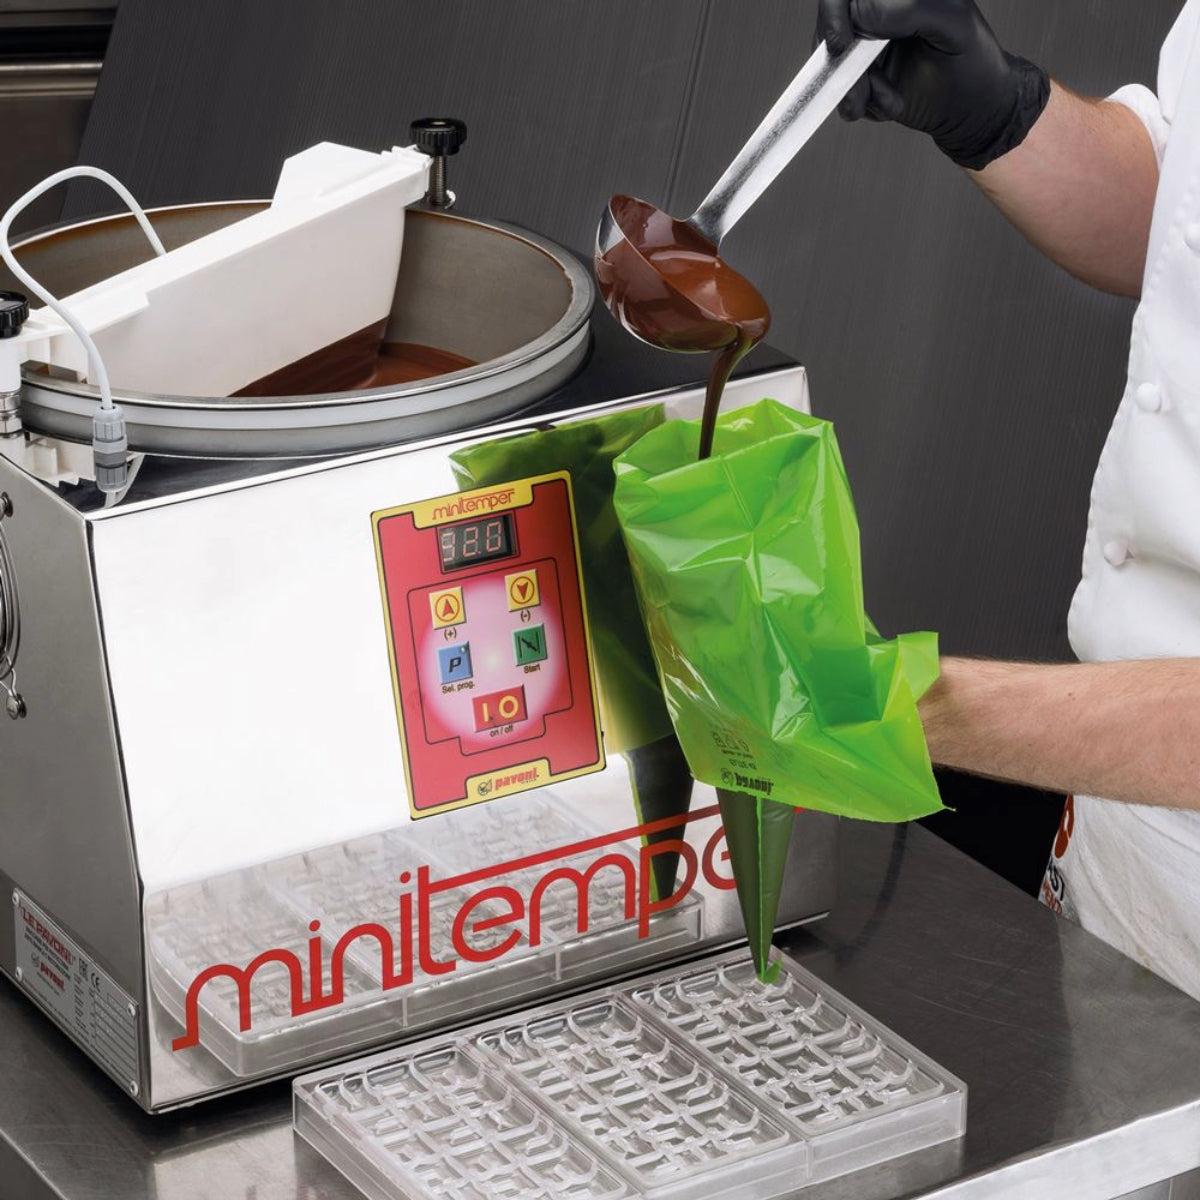
- Tempering machines for consistent results
- Sous vide setups for precise temperature control
Cooling Methods:
- Marble slab for traditional cooling
- Cool room temperature
- Fans for even cooling (never refrigeration unless specified)
Proper Working Surfaces
Your workspace significantly impacts tempering success:
Ideal Surfaces:
- Marble slab (traditional method)
- Stainless steel
- Heat-resistant glass
- Silicone mats
Surface Preparation:
- Clean thoroughly with no soap residue
- Completely dry (any moisture will cause seizing)
- Temperature-neutral (not too cold or warm)
- Spacious enough for comfortable working
Mixing and Handling Tools
Quality tools improve precision and results:
Essential Tools:
- Flexible silicone spatulas
- Offset spatulas for spreading
- Dipping forks or spiral dippers
- Scrapers for marble method
- Brushes for mold work
- Heat gun for quick fixes
Molds and Containers:
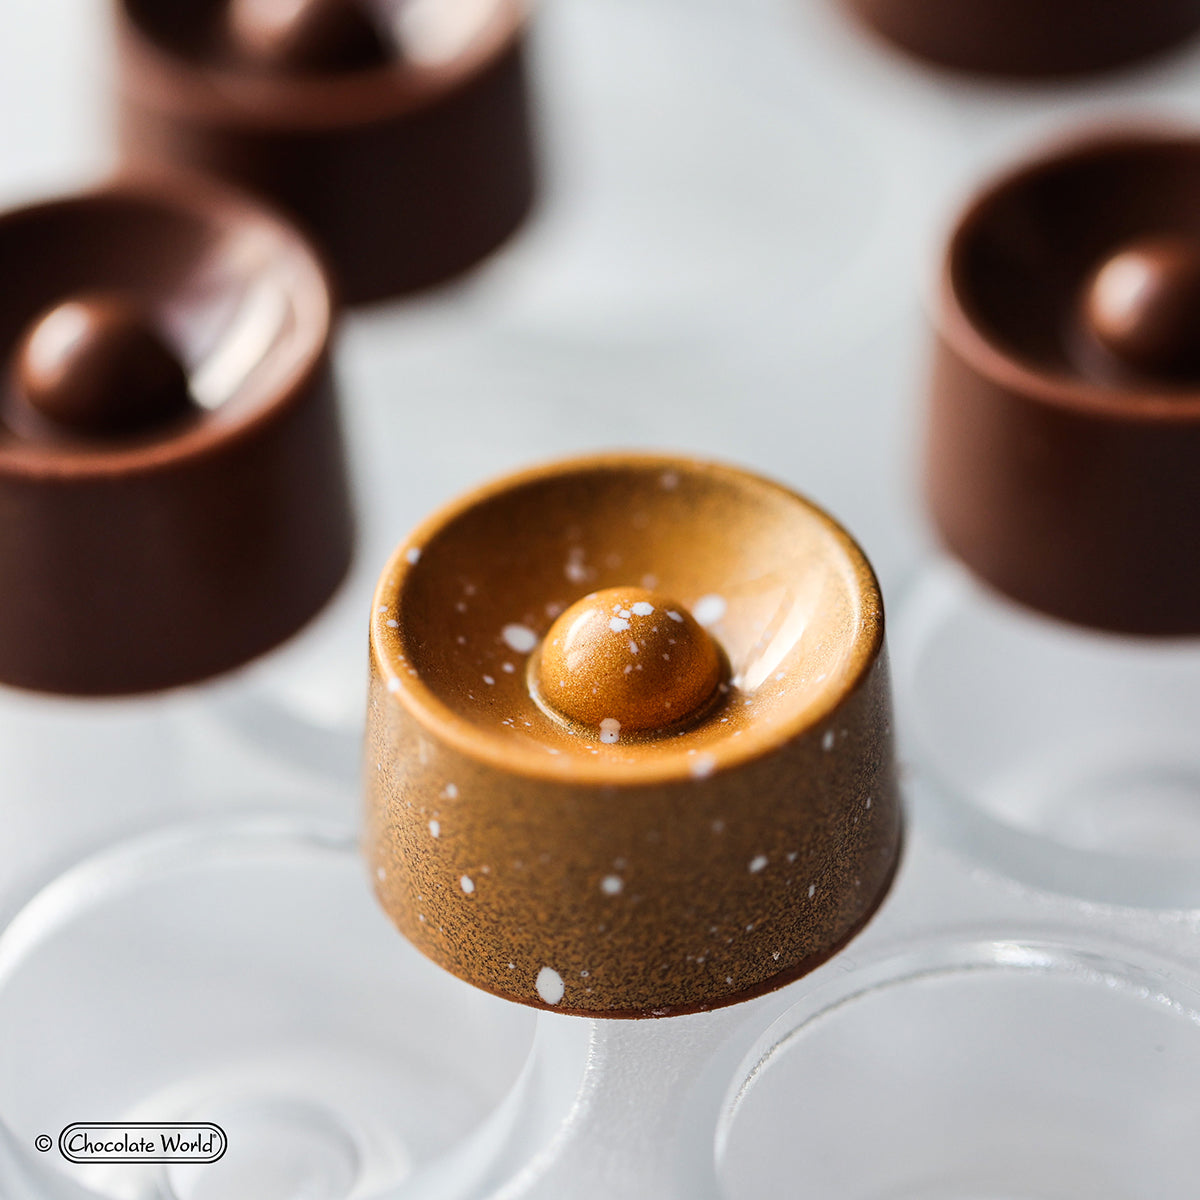
- Polycarbonate molds for shine
- Silicone molds for flexibility
- Tempered glass bowls for melting
- Metal bowls for quick temperature changes
Step-by-Step Troubleshooting Guide
Temperature Issues
Temperature problems are the most common culprit in failed tempering:
Problem: Chocolate Won't Melt Smoothly
- Diagnosis: Insufficient heating or uneven heating
- Solution: Ensure chocolate is chopped into small, uniform pieces for even melting; use gentle, consistent heat
Problem: Chocolate Seizes During Melting
- Diagnosis: Water contamination or overheating
- Solution: Ensure all equipment is completely dry; use lower heat; if seized, add additional warm cocoa butter and stir vigorously
Problem: Cannot Reach Correct Working Temperature
- Diagnosis: Environmental factors or equipment limitations
- Solution: Use a heating pad or warm towel to maintain temperature; work in a temperature-controlled environment
Problem: Temperature Fluctuates Too Much
- Diagnosis: Inconsistent heat source or drafty environment
- Solution: Use a more stable heat source; insulate your setup; create a draft-free workspace
Technique Problems
Your approach to tempering can significantly affect results:
Problem: Chocolate Doesn't Gain Shine Even at Correct Temperatures
- Diagnosis: Insufficient agitation or improper crystal formation
- Solution: Increase stirring during cooling phase; add more seed chocolate; ensure you're using high-quality chocolate
Problem: Uneven Results Within the Same Batch
- Diagnosis: Insufficient mixing or temperature gradients
- Solution: Stir more thoroughly; check for hot/cold spots; ensure even cooling
Problem: Chocolate Thickens Too Quickly
- Diagnosis: Too rapid cooling or over-crystallization
- Solution: Work at the higher end of the working temperature range; add a small amount of warm untempered chocolate
Problem: Chocolate Sets With Visible Streaks
- Diagnosis: Uneven crystal formation or temperature variations
- Solution: Ensure thorough mixing during tempering; check for consistent temperature throughout the chocolate
Ingredient Quality Concerns
The quality of your chocolate fundamentally affects tempering success:
Problem: Chocolate Never Achieves Proper Temper
- Diagnosis: Low-quality chocolate or insufficient cocoa butter
- Solution: Use high-quality couverture chocolate with at least 31% cocoa butter; avoid compound chocolate or chips for tempering
Problem: Chocolate Develops Bloom Soon After Tempering
- Diagnosis: Poor chocolate quality or poor storage conditions
- Solution: Use fresh, high-quality chocolate; store properly at consistent temperatures
Problem: Chocolate Has Inconsistent Results Between Batches
- Diagnosis: Different chocolate brands or formulations
- Solution: Stick with one brand and type for consistent results; adjust tempering temperatures to match manufacturer recommendations
Recommended Chocolate Brands for Tempering:
- Valrhona
- Callebaut
- Guittard
- Ghirardelli (premium baking bars, not chips)
- Cocoa Barry
- Scharffen Berger
Environmental Factors
Your workspace environment dramatically impacts tempering success:
Problem: Chocolate Never Sets Firmly
- Diagnosis: Too warm environment or high humidity
- Solution: Lower room temperature to 65-70°F (18-21°C); use air conditioning or dehumidifier to control humidity
Problem: Chocolate Develops Sugar Bloom
- Diagnosis: Humidity above 50% or condensation
- Solution: Control ambient humidity; avoid temperature fluctuations that cause condensation
Problem: Chocolate Sets Too Quickly to Work With
- Diagnosis: Environment too cold
- Solution: Raise room temperature slightly; warm tools and molds before use
Ideal Working Environment:
- Temperature: 64-70°F (18-21°C)
- Humidity: 50-65%
- No drafts or direct sunlight
- Clean, dust-free space
Professional Techniques to Rescue Failed Tempering
The Re-Tempering Process
When tempering goes wrong, you can often save your chocolate:
- Melt Completely: Heat chocolate above the highest melting point (122°F/50°C for dark) to eliminate all crystal forms
- Cool Properly: Follow cooling process methodically, monitoring temperature closely
- Seed Correctly: Add 15-25% already tempered chocolate to introduce proper crystals
- Maintain Working Temperature: Hold at the proper working temperature while using
The Seeding Method
The seeding method is often the easiest way to correct failed tempering:
- Melt chocolate to proper temperature based on type (dark: 120-122°F, milk: 115-118°F, white: 105-113°F)
- Cool to approximately 95°F (35°C)
- Add finely chopped, already tempered chocolate (about 25% of total weight)
- Stir continuously until seed chocolate melts and temperature reaches cooling point
- Test temper by spreading a small amount on parchment paper—it should begin to set within 2-3 minutes with a glossy finish
- Maintain working temperature while using
Using Cocoa Butter Silk
For advanced troubleshooting, cocoa butter silk can rescue difficult tempering situations:
What is Cocoa Butter Silk?
- Pre-crystallized cocoa butter with stable Form V crystals
- Acts as a powerful "seed" for proper crystallization
How to Use:
- Melt chocolate to proper temperature
- Cool to approximately 95°F (35°C)
- Add 1% cocoa butter silk by weight
- Stir until completely incorporated
- Use immediately at proper working temperature
This method is particularly effective for chocolate that has repeatedly failed to temper properly or for small batches where precise control is difficult.
Preventing Future Tempering Problems
Best Practices
Developing good habits prevents most tempering issues:
- Always use high-quality couverture chocolate with sufficient cocoa butter content
- Chop chocolate into uniform small pieces for even melting
- Use an accurate digital thermometer and check calibration regularly
- Never allow water or steam to contact chocolate
- Work in a controlled environment with stable temperature and humidity
- Practice with small batches before attempting larger projects
- Document successful temperatures and techniques for your specific workspace
Workspace Setup
Create an optimal environment for tempering success:
- Install a thermometer and hygrometer to monitor conditions
- Use air conditioning or dehumidifiers in warm, humid climates
- Create a draft-free work area
- Ensure all surfaces are completely clean and dry
- Have all tools and molds prepared before beginning
- Set up proper lighting to easily spot visual cues
- Use a fan for controlled, even cooling when needed
Preparation Tips
Proper preparation significantly increases tempering success:
- Allow chocolate to acclimate to room temperature before unwrapping
- Clean and polish molds thoroughly
- Warm molds slightly to match chocolate temperature
- Have seed chocolate ready and chopped
- Pre-measure all ingredients
- Set up a tempering log to track successful techniques
- Practice the "temper test" to gauge success before proceeding
- Have backup chocolate available for adjustments
FAQ Section
Q: Why does my chocolate have white streaks after it sets?
A: White streaks typically indicate bloom, caused by either improper tempering or temperature fluctuations during storage. Fat bloom appears as streaky or blotchy areas, while sugar bloom has a more powdery appearance. Re-temper the chocolate completely to resolve this issue, and ensure proper storage at a consistent temperature between 60-70°F (15-21°C).
Q: Can I fix chocolate that has seized during melting?
A: It depends on the cause. If chocolate seized due to moisture, add more warm (not hot) chocolate and stir vigorously—this may make it usable for baking but not for tempering. If it seized due to overheating, cooling it slightly and adding small amounts of cocoa butter while stirring may help recover it. For severe seizing, it's often best to use the chocolate for ganache or other applications where appearance isn't critical.
Q: Is it necessary to temper chocolate for all recipes?
A: No. Tempering is only necessary when the final product needs a glossy finish, snap, and stability at room temperature. Chocolate used in baking, ganaches, or melted into batters doesn't require tempering since its structure is altered during cooking or mixing anyway.
Q: Why is my tempered chocolate too thick to work with?
A: Overly thick tempered chocolate usually indicates the temperature is too low or crystallization has progressed too far. Gently raise the temperature (staying within the working range for your chocolate type) or add a small amount of warm, untempered chocolate to thin the consistency. High-quality couverture chocolate (with more cocoa butter) typically has better flow properties.
Q: Can I temper chocolate without a thermometer?
A: While possible for experienced chocolatiers who recognize visual and tactile cues, a good thermometer is essential for beginners. Temperature control is the most critical factor in successful tempering, and even small deviations can cause failures. Invest in a digital thermometer with 0.1-degree precision for best results.
Q: Why does my chocolate bloom even after proper tempering?
A: Even properly tempered chocolate can bloom if stored incorrectly. Common culprits include temperature fluctuations, exposure to humidity, or condensation from moving between cold and warm environments. Store tempered chocolate in a cool, dry place with consistent temperature, ideally between 60-70°F (15-21°C) with humidity below 50%.
Q: How can I tell if my chocolate is properly tempered before using it?
A: Perform the "temper test": Spread a small amount of chocolate on parchment paper or the back of a spoon. At room temperature, it should begin to set within 2-3 minutes, appear glossy, and once fully set, should snap cleanly and not melt immediately when touched. If it takes longer to set or appears dull, the tempering isn't correct.
Q: Can I use chocolate chips for tempering?
A: Standard chocolate chips are not ideal for tempering as they contain additives that help them maintain their shape when baked. These additives interfere with proper crystal formation. Always use high-quality couverture chocolate or baking bars specifically designed for melting and tempering.
Conclusion and Key Takeaways
Mastering chocolate tempering requires understanding the science of crystal formation, precise temperature control, and attention to environmental factors. While challenges may arise, nearly all tempering problems can be solved with proper diagnosis and techniques.
Remember these essential points:
- Temperature control is the foundation of successful tempering
- Each type of chocolate requires specific temperature ranges
- High-quality couverture chocolate with sufficient cocoa butter content tempers most reliably
- A clean, dry workspace with controlled temperature and humidity is essential
- Practice and documentation improve your results over time
With patience and practice, you'll develop the skills to create professionally tempered chocolate confections that delight both the eye and the palate. When problems arise, return to this troubleshooting guide to diagnose and solve your specific tempering challenges.


Dejar un comentario
Todos los comentarios se revisan antes de su publicación.
Este sitio está protegido por hCaptcha y se aplican la Política de privacidad de hCaptcha y los Términos del servicio.